Admin Interface
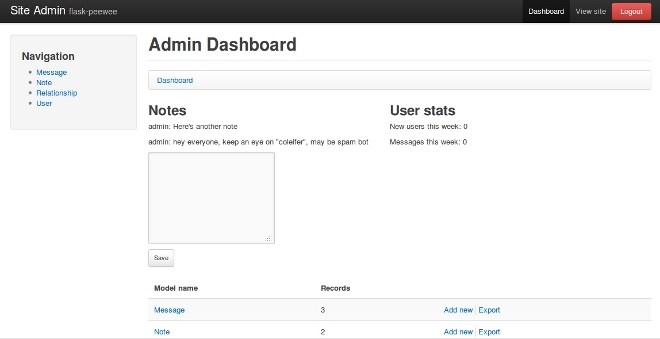
Many web applications ship with an “admin area”, where priveleged users can view and modify content. By introspecting your application’s models, flask-turboduck can provide you with straightforward, easily-extensible forms for managing your application content.
Here’s a screen-shot of the admin dashboard:
Getting started
To get started with the admin, there are just a couple steps:
Instantiate an Auth backend for your project – this component is responsible for providing the security for the admin area
from flask import Flask

from flask_turboduck.auth import Auth
from flask_turboduck.db import Database

app = Flask(__name__)
db = Database(app)

# needed for authentication
auth = Auth(app, db)
Instantiate an Admin object
# continued from above...
from flask_turboduck.admin import Admin

admin = Admin(app, auth)
Register any ModelAdmin or AdminPanel objects you would like to expose via the admin
# continuing... assuming "Blog" and "Entry" models
admin.register(Blog) # register "Blog" with vanilla ModelAdmin
admin.register(Entry, EntryAdmin) # register "Entry" with a custom ModelAdmin subclass

# assume we have an "AdminPanel" called "NotePanel"
admin.register_panel('Notes', NotePanel)
Call Admin.setup(), which registers the admin blueprint and configures the urls
# after all models and panels are registered, configure the urls
admin.setup()
Note
For a complete example, check the Example App which ships with the project.
Customizing how models are displayed
We’ll use the “Message” model taken from the example app, which looks like this:
class Message(db.Model):
    user = ForeignKeyField(User)
    content = TextField()
    pub_date = DateTimeField(default=datetime.datetime.now)

    def __unicode__(self):
        return '%s: %s' % (self.user, self.content)
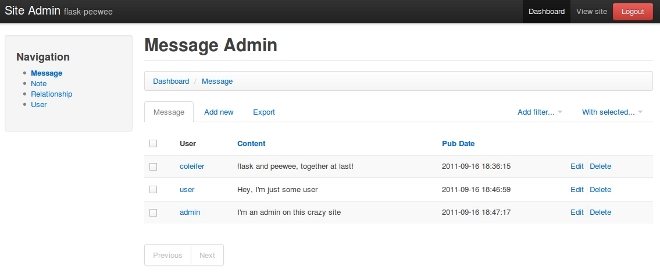
If we were to simply register this model with the admin, it would look something like this:
admin = Admin(app, auth)
admin.register(Message)

admin.setup()
A quick way to improve the appearance of this view is to specify which columns to display. To start customizing how the Message model is displayed in the admin, we’ll subclass ModelAdmin.
from flask_turboduck.admin import ModelAdmin

class MessageAdmin(ModelAdmin):
    columns = ('user', 'content', 'pub_date',)

admin.register(Message, MessageAdmin)

admin.setup()
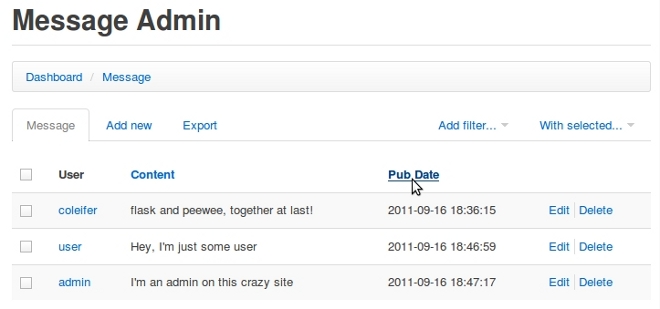
Now the admin shows all the columns and they can be clicked to sort the data:
Suppose privacy is a big concern, and under no circumstances should a user be able to see another user’s messages – even in the admin. This can be done by overriding the get_query() method:
def get_query(self):
    return self.model.select().where(self.model.user == g.user)
Now a user will only be able to see and edit their own messages.
Overriding Admin Templates
Use the ModelAdmin.get_template_overrides() method to override templates for an individual Model:
class MessageAdmin(ModelAdmin):
    columns = ('user', 'content', 'pub_date',)

    def get_template_overrides(self):
        # override the edit template with a custom one
        return {'edit': 'messages/admin/edit.html'}

admin.register(Message, MessageAdmin)
This instructs the admin to use a custom template for the edit page in the Message admin. That template is stored in the application’s templates. It might look something like this:
{% extends "admin/models/edit.html" %} {# override the default edit template #}

{# override any blocks here #}
There are five templates that can be overridden:
- index
- add
- edit
- delete
- export
Nicer display for Foreign Key fields
If you have a model that foreign keys to another, by default the related model instances are displayed in a <select> input.
This can be problematic if you have a large list of models to search (causes slow load time, hurts the database). To mitigate this pain, foreign key lookups can be done using a paginated widget that supports type-ahead searching.
Setting this up is very easy:
class MessageAdmin(ModelAdmin):
    columns = ('user', 'content', 'pub_date',)
    foreign_key_lookups = {'user': 'username'}
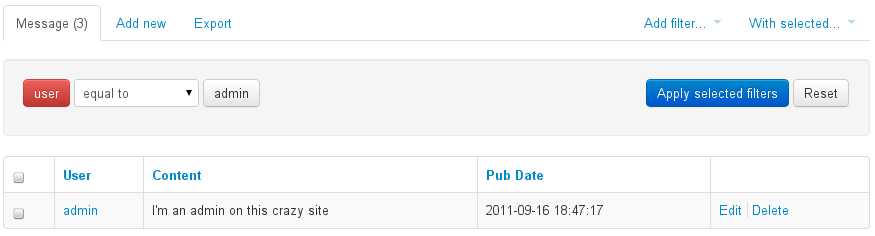
When flask-turboduck sees the foreign_key_lookups it will use the special modal window to select instances. This applies to both filters and model forms:
Filters
- Select a user by clicking the “Select...” button

- A modal window with a paginated list and typeahead search appers:
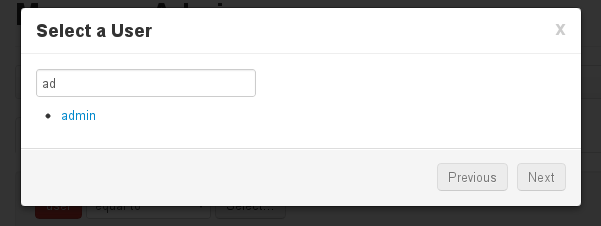
- The button now indicates the selected user, clicking again will reload the dialog:
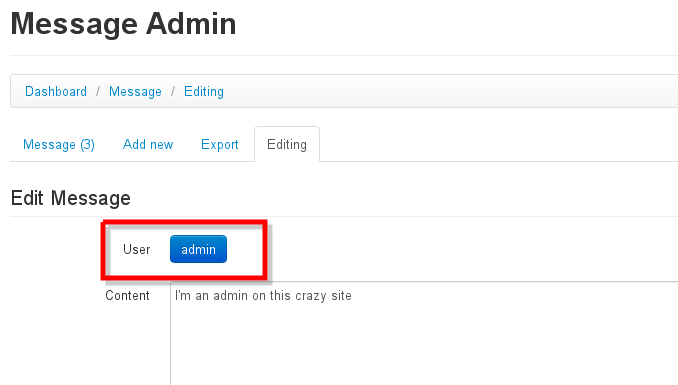
Admin ModelForms
The interface is the same as with the filters, except the foreign key field is replaced by a simple button:
Creating admin panels
AdminPanel classes provide a way of extending the admin dashboard with arbitrary functionality. These are displayed as “panels” on the admin dashboard with a customizable template. They may additionally, however, define any views and urls. These views will automatically be protected by the same authentication used throughout the admin area.
Some example use-cases for AdminPanels might be:
- Display some at-a-glance functionality in the dashboard, like stats on new user signups.
- Provide a set of views that should only be visible to site administrators, for example a mailing-list app.
- Control global site settings, turn on and off features, etc.
Referring to the example app, we’ll look at a simple panel that allows administrators to leave “notes” in the admin area:
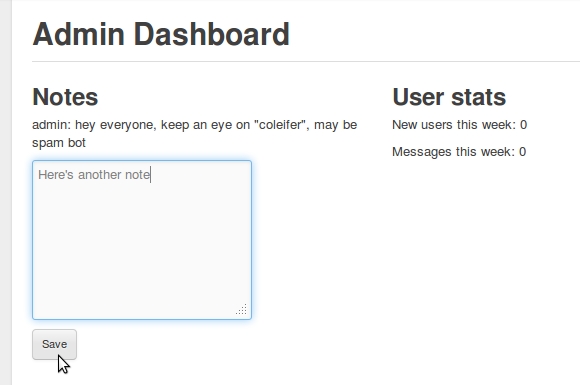
Here’s what the panel class looks like:
class NotePanel(AdminPanel):
    template_name = 'admin/notes.html'

    def get_urls(self):
        return (
            ('/create/', self.create),
        )

    def create(self):
        if request.method == 'POST':
            if request.form.get('message'):
                Note.create(
                    user=auth.get_logged_in_user(),
                    message=request.form['message'],
                )
        next = request.form.get('next') or self.dashboard_url()
        return redirect(next)

    def get_context(self):
        return {
            'note_list': Note.select().order_by(Note.created_date.desc()).limit(3)
        }
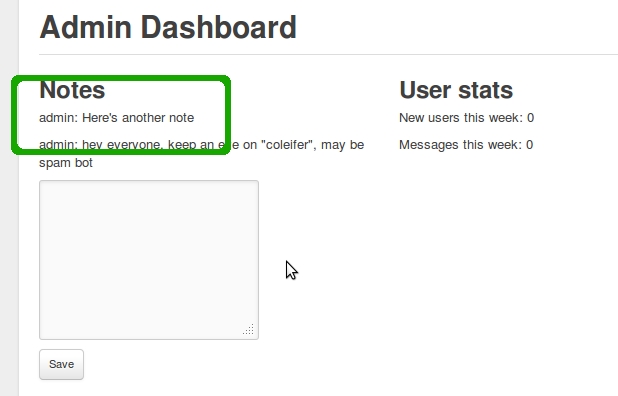
When the admin dashboard is rendered (/admin/), all panels are rendered using the templates the specify. The template is rendered with the context provided by the panel’s get_context method.
And the template:
{% extends "admin/panels/default.html" %}

{% block panel_content %}
  {% for note in note_list %}
    <p>{{ note.user.username }}: {{ note.message }}</p>
  {% endfor %}
  <form method="post" action="{{ url_for(panel.get_url_name('create')) }}">
    <input type="hidden" value="{{ request.url }}" />
    <p><textarea name="message"></textarea></p>
    <p><button type="submit" class="btn small">Save</button></p>
  </form>
{% endblock %}
A panel can provide as many urls and views as you like. These views will all be protected by the same authentication as other parts of the admin area.
Handling File Uploads
Flask and wtforms both provide support for handling file uploads (on the server and generating form fields). turboduck, however, does not have a “file field” – generally I store a path to a file on disk and thus use a CharField for the storage.
Here’s a very simple example of a “photo” model and a ModelAdmin that enables file uploads.
# models.py
import datetime
import os

from flask import Markup
from turboduck import *
from werkzeug import secure_filename

from app import app, db


class Photo(db.Model):
    image = CharField()

    def __unicode__(self):
        return self.image

    def save_image(self, file_obj):
        self.image = secure_filename(file_obj.filename)
        full_path = os.path.join(app.config['MEDIA_ROOT'], self.image)
        file_obj.save(full_path)
        self.save()

    def url(self):
        return os.path.join(app.config['MEDIA_URL'], self.image)

    def thumb(self):
        return Markup('<img src="%s" style="height: 80px;" />' % self.url())
# admin.py
from flask import request
from flask_turboduck.admin import Admin, ModelAdmin
from wtforms.fields import FileField, HiddenField
from wtforms.form import Form

from app import app, db
from auth import auth
from models import Photo


admin = Admin(app, auth)


class PhotoAdmin(ModelAdmin):
    columns = ['image', 'thumb']

    def get_form(self, adding=False):
        class PhotoForm(Form):
            image = HiddenField()
            image_file = FileField(u'Image file')

        return PhotoForm

    def save_model(self, instance, form, adding=False):
        instance = super(PhotoAdmin, self).save_model(instance, form, adding)
        if 'image_file' in request.files:
            file = request.files['image_file']
            instance.save_image(file)
        return instance

admin.register(Photo, PhotoAdmin)